How to catalog music collection online
Sign in
Search
Uploading to Racks and Tags
NEW: You can now use free Racks and Tags Publisher to automatically add MP3 and lossless albums to your online catalog.
Racks and Tags is the website where you can create online catalog for your music collection, and maintain it in the up-to-this-minute state with minimum effort. Sounds nice, but how exactly it is going to happen?
It's much simpler than you think. Uploading catalog of your entire music library to Racks and Tags is very easy and can be done in less than 10 minutes, from start to end. And what's best of it, consequent updates will take mere seconds. You will need to download and install compact software for Windows. (Sorry, we don't support Macs yet.)
Ready? Let's get started.
1. Create account
First of all, you need to create an account with us, so we can tell you from other users. Luckily, it is easy to register a new account. Basic accounts cost nothing, and all you need is working e-mail (which is good idea anyway in case you lose your password.) Click here to register your new account.
2. Install OrangeCD Suite
 OrangeCD Suite is the music database software for Windows. Skip this step if you have it already. OrangeCD Suite is trialware. You can use the trial version without limitations for 30 days, after which time you should decide - either purchase or stop using it. Regardless of your decision, we will keep your music catalog online for indefinite time.
OrangeCD is adware-free, has been available since last century and has the reputation of being one of the best music cataloging tools out there.
The installation package can be downloaded from OrangeCD Suite download page. It is so small that it can be downloaded in 1-2 minutes using average Internet connection. Once the installation package downloads completely, double-click it and follow the instructions on the screen. Setup process is trivial - you need to click Next button on every page and it will use all default settings. At one point you will need to check I Agree option to confirm you agree with the terms of the software license.
Once OrangeCD Suite installation is complete, you are ready to scan music files on your hard drive or music CDs.
3. Scan music library
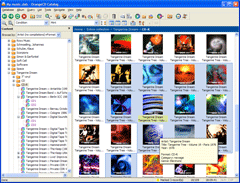
OrangeCD Suite comes with preinstalled sample database, but we suggest to start a new database to keep catalog of your music collection. A new database can be started using menu Database – New database, or, alternatively, by clicking Create a new database button in the startup screen.
Now you can scan your music collection on hard drive by clicking menu Album – Scan media files. Select the folder where you keep your music files and press Scan button. Depending on size of your collection, it may take some time - from several seconds to several minutes to scan all your albums.
Do you still listen to old-fashioned CDs? No problem at all. With OrangeCD Suite, you can catalog all kinds of media, including vinyl records, tapes, and music videos. OrangeCD website has instructions on how to catalog music CDs or other media.
4. Upload catalog
After what you already achieved, this step may seem trivial. Click menu Tools – Upload to Racks and Tags... If this is a very first time you upload to Racks and Tags, enter your account username and password. Have some patience at this point, as the initial upload may take awhile. Don't be discouraged by the time initial upload takes, because it's only a one time operation, and consequent updates will be 10x faster.
When it's finished, you can enjoy a nice cup of tea, looking at online catalog of your music library.
Any questions? Feel free to send us a message using feedback form or write e-mail to support@racksandtags.com.